Dartboard Set Up for Steel Tip Darts
Dartboard Set Up for Steel Tip Darts: A visual guide to help you set up and install your dartboard like a pro!
Dartboard Set Up Process: Before you begin installing your dartboard, you’ll first need to gather a few basic tools outlined below.
As an Amazon Associate I earn from qualifying purchases.
Dartboard Set Up: Prepare to Install the Dartboard:
Installing a dartboard is very simple and can easily be installed by a single person. If you're new to the dartboard set up process, it never hurts to have a friend or teammate assist you.
Tools You'll Need for Proper Dartboard Set-Up:
Dartboard Set-Up Preparation:
Gather and prepare the following tools:
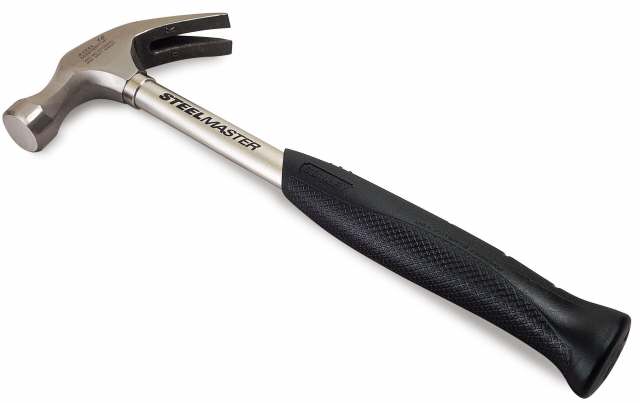
A basic hammer.
A pencil.
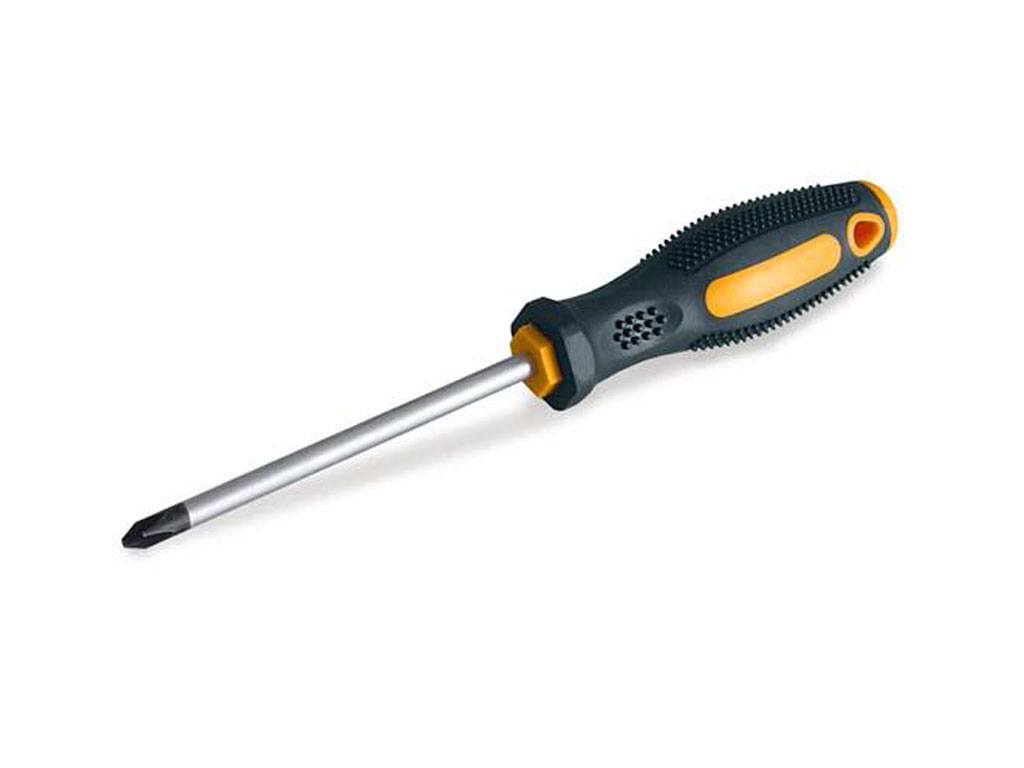
Phillips head screwdriver.
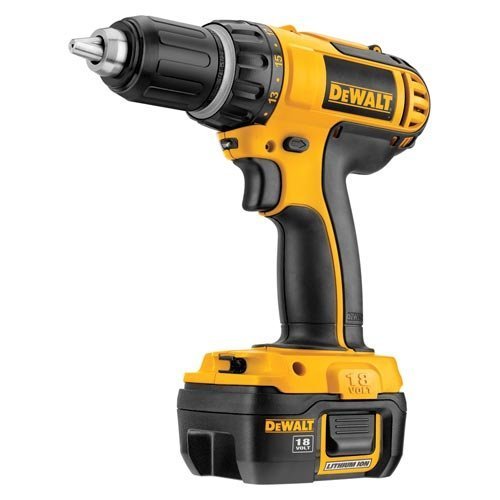
Optional electric drill with phillips head bit.
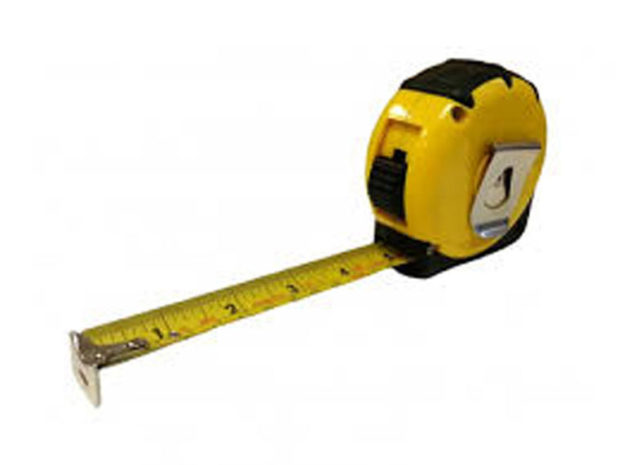
Tape measure.
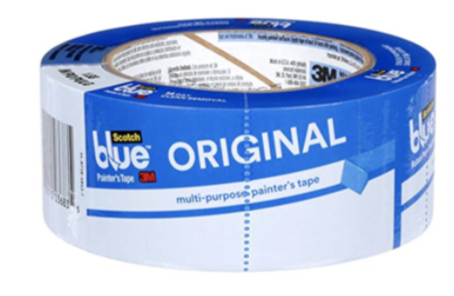
Optional blue painters tape.
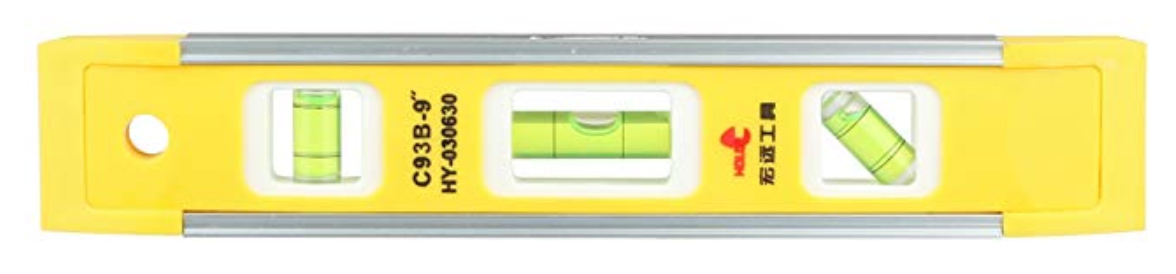
A small level.
Dartboard Set Up: Prepare to Set Up and Install your Dartboard:
If you are installing the dartboard on a backboard, in a dartboard cabinet, it may be helpful to have assistance. Considering asking the president of the league, or another knowledgeable dart player or league member to assist you. I'm sure they would be happy to help you out for a free drink or two.
Prepare Yourself:
Get organized to prepare yourself to install your dartboard. Preparation is an important aspect to proper dartboard installation. It's important to understand there's more to installing a dartboard than just 'hanging it on a wall'. Therefore, if you need detailed assistance, you can also download this free, visual, step-by-step dartboard setup guide to help you with the installation. You should also refer to the installation guide that also came in the same box as your dartboard. Ready to install your dartboard? Let's get started!
First, you are going to need the tools.
Gather and organize all of your tools and keep them within reach.
Prepare and Gather All Tools:
Prepare the Dartboard for Set Up:
- Hammer
- Pencil
- Phillips head screwdriver or an electric drill/screwdriver (optional)
- A standard tape measure
- Or (optional) Winmau Set Up Pro
- or (optional) Viper ProThrow Line Marker Tape
- An oche/throwline
- Blue painters tape (optional)
- A small level
First Step to Prepare Your Dartboard:
This guide is written with the assumption that you already have a dartboard and you’re ready to install it. Don’t have a dartboard? Not sure which dartboard to purchase?
Here are a few top choices to consider:
Winmau Blade 5 Dartboard
Unicorn Eclipse Pro Dartboard
Nodor - Professional Level - Supamatch 3 Dartboard
These are quality dartboards that will last longer than cheaply made, less expensive options. Therefore, it’s worth spending $10 or $20 dollars more for a dartboard that will last longer and hold the darts better. Once you have your dartboard, you‘re ready to get started.
Regardless of where the dartboard will be installed, it's important to always try to provide a great dart playing experience. Whether you're installing a dartboard at home, or in a pub or bar, one way to do this, is to always start with a new dartboard or a board in excellent condition.
Follow the Instructions to Prepare the Dartboard
Now is the time to pull out the small instruction guide that came with your dartboard (check the box). In addition to the tools listed in this guide, you’ll also need the parts that came with your dartboard.
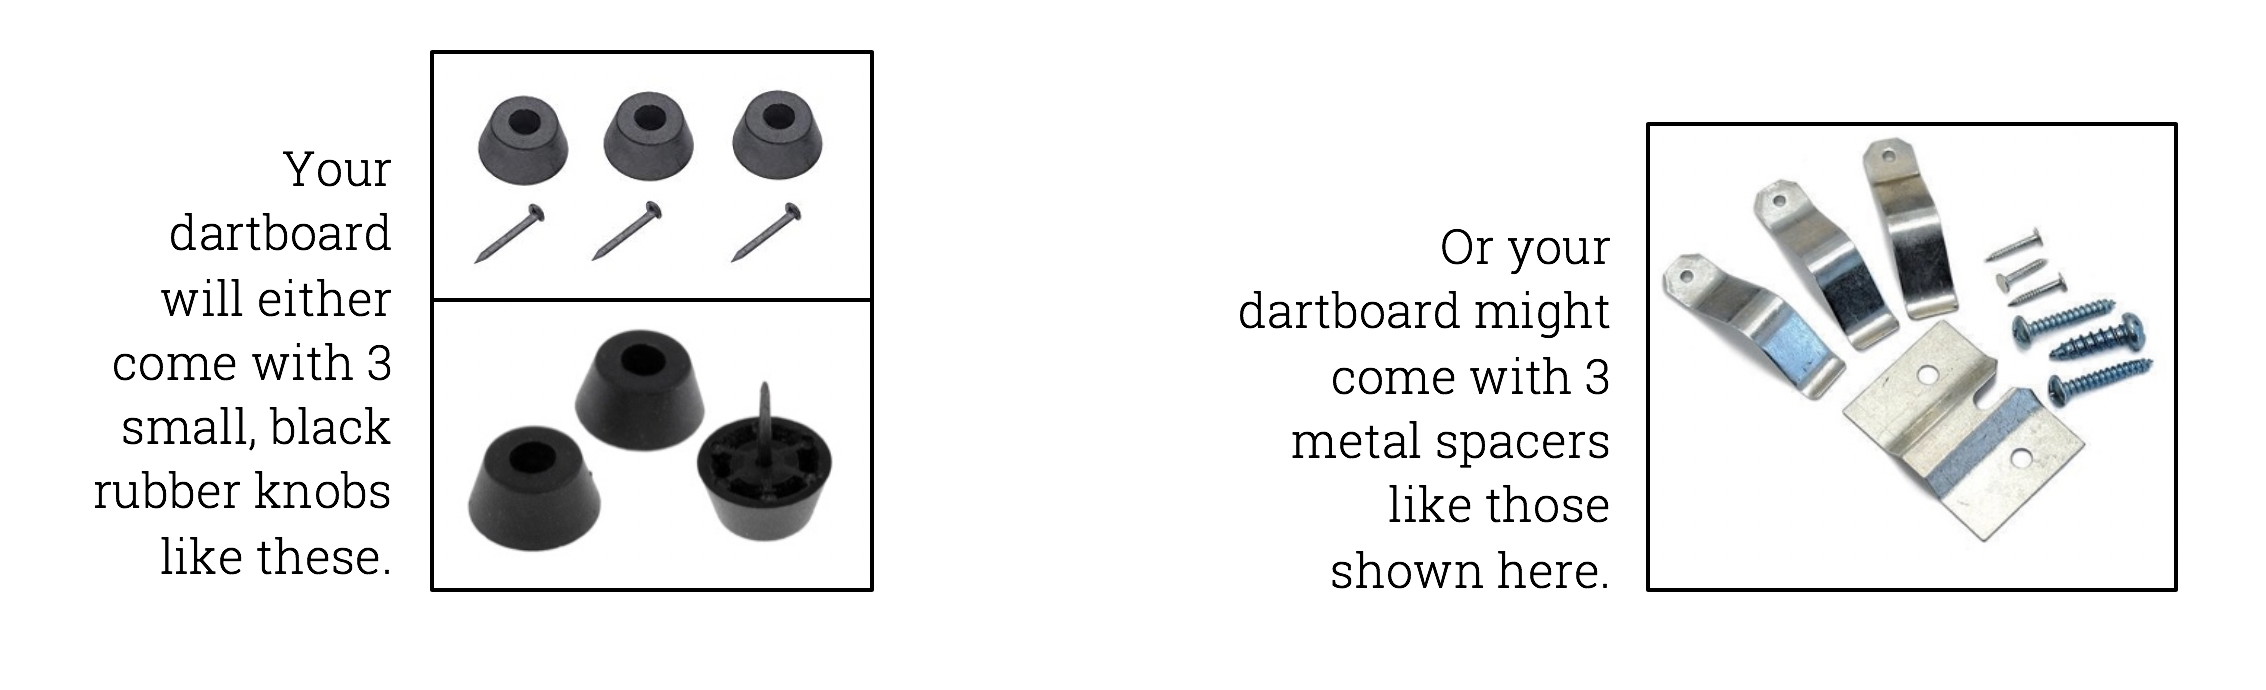
In the dartboard box, the dartboard came in, you should find a small packet or plastic bag. The packet contains several components to assist with the dartboard setup process. Generally, the packet includes a dartboard bracket, the 3 small screws, 3-6 small nails, and the 3 small, black rubber knobs (or metal spacers.) Depending on the dartboard manufacturer, the box will contain either the black rubber knobs or metal spacers.
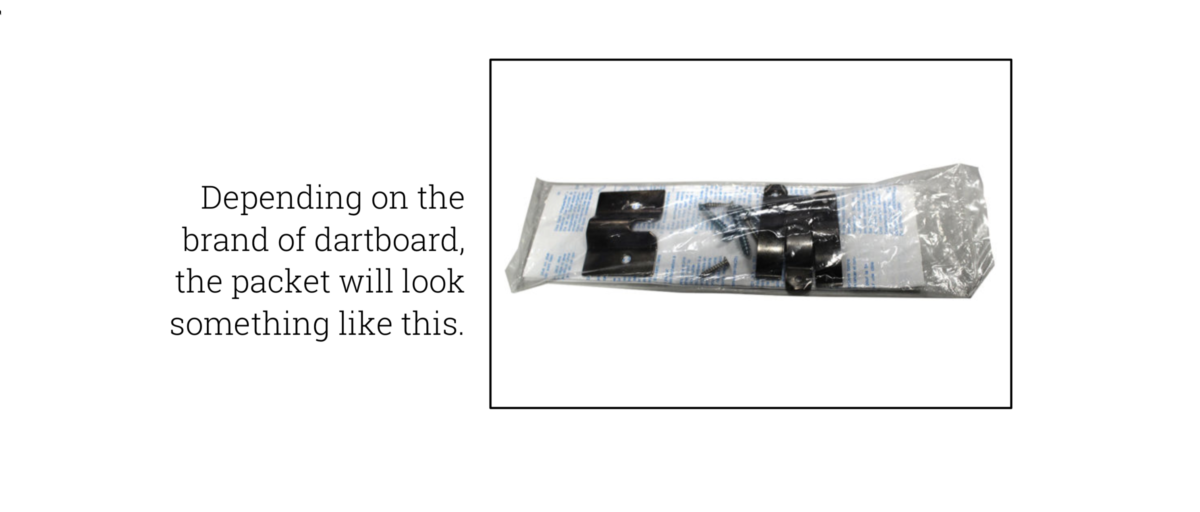
Sample packet containing parts and instruction for dartboard set up. This packet (or one similar) comes with all new dartboards.
Using a mallet or hammer, install the 3 small rubber knobs or metal spacers on the back of the dartboard. Look for the designated/marked areas on the back of the dartboard. That's where the knobs or spacers get installed. Tap them lightly until they are tight and in the correct location. You’ll see 3 marks on the back of the dartboard indicating where the knobs/spacers should be installed. Next, locate the small, standalone screw that came with the dartboard.
A close-up of the parts that come in the packet, used for dartboard set up.
(At this time, please take a minute to review the guide that came with your dartboard. Ensure you install the correct screw in the center of the back of the board.)The other 2 screws are used for installing the bracket, which is explained later in this guide. Next, locate the premade hole or mark located directly in the center of the back of the dartboard.
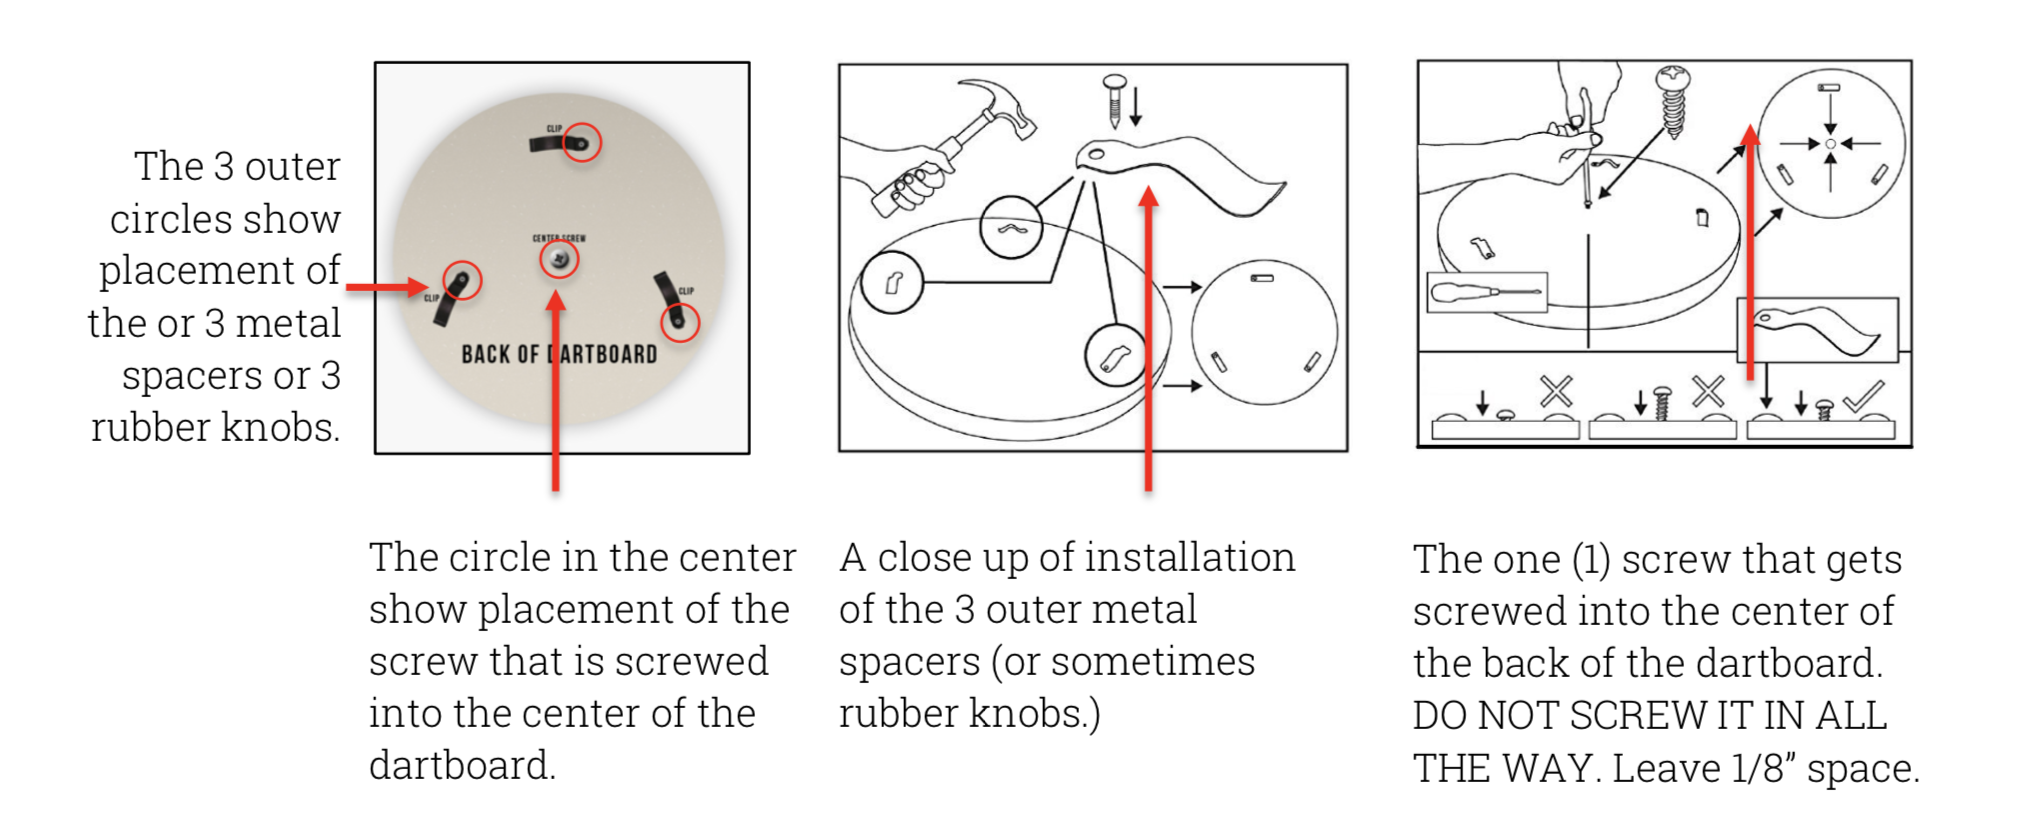
A diagram showing how the parts that come in the packet are used for dartboard set up.
Using your screwdriver, screw the screw into the center mark on the back of the dartboard. But DO NOT screw it all the way in. Leave about 1/8” of space at the top of the screw. The screw has to stick out a little so it can slide into and rest on the cut-out (U-shaped) portion of the bracket.
Select the Location:
If you’re installing your dartboard at home, as long as you have enough space around the dartboard and throwing area to meet the proper measurement requirements outlined in this guide, you can install your board just about anywhere. As for the condition of the physical wall itself, ensure the wall is clean, flat and level, and can hold the weight of the dartboard and an optional surround, backboard or dartboard case. To ensure the wall can hold the weight, it is best to mount the board, backboard or cabinet to wall studs. If you do not have wall studs in the area you want to hang the board, you may want to use Molly Bolts to ensure the board, backboard or cabinet will not fall out.
Second Step, Make a Choice: On a Wall, On a Backboard, or In a Dartboard Cabinet?
Once you decide where you’re going to hang/install the dartboard, you now need to decide if you’re going to utilize a backboard or a pre-made dartboard case (the least recommended for a bar/pub). It is highly recommended to utilize a surround and/or a backboard.
Similar to a backboard, the dartboard case would also get installed on the wall first, with the dartboard hung inside the case. Depending on the material of the wall, e.g. drywall, cement, paneling, etc., you may also need to adjust your tools.
Details for both options are below.
If you are installing the dartboard at a venue that will be participating in a dart league, keep in mind the venue, bar or pub, as well as the dart league itself, may have their own rules and policies for hanging a dartboard and creating a throwing area around the board.
Additionally, you have to consider other factors such as leaving enough space for a scoreboard, and enough space for a scorekeeper to stand next to the dartboard. This concludes the dartboard preparation section.
Bar and Pub Owners:
Please continue to the next section, below 'Special Section for Bar or Pub Owners'.
Not a Bar or Pub Owner?
If you are installing your dartboard in your home, the information on the 'Bar and Pub Owners section' is an optional read, but will no doubt be very helpful. However, you can also scroll directly to the 'INSTALLATION OPTIONS WHEN HANGING YOUR DARTBOARD' section, below.
SPECIAL SECTION FOR BAR AND PUB OWNERS:
Here’s What You Need to Know to Properly Install a Dartboard at a Pub or Bar:
- First, prepare the wall where the board will be hung. Naturally, the wall should be level, clean, be able to be drilled into, and strong enough to hold the weight of a dartboard and an optional backboard or surround. Remember, the wall should have at least 2-3 ft. on each side of the board for a scorekeeper to stand and for a scoreboard to be installed. Ideally, the space should also be in close proximity to an electrical outlet to plug in the light, lamp or LED light ring to illuminate the dartboard.
- The dartboard should not be installed near a door or doorway of a kitchen, near bathroom doors, near the area of the bar where servers pick up drinks, or near the entrance or exit of the establishment, bar/pub.
Lighting Matters!
- The dartboard should be well lit. One of the best ways to provide proper lighting is by installing a dedicated lamp or light fixture no less than 6” - 12” above the dartboard. The light or lamp should be positioned so as not to cast shadows on the board. Bar/pub owners should not rely on the existing lighting in the venue to provide the proper dartboard lighting and a great dart playing experience, because it won’t. For the best lighting set up, consider a professional, LED light ring. Here are two examples (Example 1: Unicorn Solar Flare Integrated Illuminated Pro Surround - 360 Degrees LED , Example 2: Target Corona Vision Lighting System .)
- Decide if you’re going to utilize a surround such a plain, black surround or a backboard (Backboard Example 1, Backboard Example 2). Consider asking your beer distributor if they can provide a backboard (Budweiser, Coors or other.)
- Even if the bar, pub, etc., is very crowded with a lot of servers, patrons/customers, the dartboard should be hung on a wall that is in a low-to-no traffic area. Meaning, the dartboard should not be set up in a way that would allow servers, bartenders or customers to walk in front of, or too close to the oche/throwline, the person throwing the darts, or the board itself. Even movement from objects or people in the peripheral vision of the dart player is a distraction you’ll want to avoid.
- When possible, an ideal dartboard set up has the oche/throwline set up so that the backs of the person throwing the darts faces the active area of the bar, restaurant, pub, club, etc.
- The dartboard should be hung in an area with enough physical space for other players or a team to congregate or sit or stand in an area or at a table behind the person throwing the darts. As a result, this will allow teammates to watch the game or walk up to the oche/throwline when it is their turn. The person throwing the darts should be able to walk to and from the oche/throwline without distractions or having to walk through patron traffic.
- The dartboard throwing area and the dartboard itself should not be installed near or in the path of an air conditioning vent, fan, an open window, bright lights, a loud jukebox, the bar, or tables or booths where patrons will be eating or drinking.
- It is essential to leave enough room around all sides of the dartboard. Typically, dart leagues have their own rules or policies. But generally, it is safe to leave at least 3’ - 4’ ft. between each dartboard (on the left and right & sides). This also leaves enough room for a scoreboard to be placed on either side of the dartboard, and for a scorekeeper to stand next to the scoreboard. It is also recommended to leave 2' - 4' from the top of the dartboard to the ceiling to leave enough room for proper lighting, a lighting fixture, or dartboard backer and surround.
- Finally, one of the easiest and most important things you can do to provide a great darting experience is to invest in a quality dartboard and take care of it. Simply rotating the dartboard every one-two weeks can extend the life of your dartboard by several months.
Now that you have some insight on how to properly prepare the dartboard and dart throwing area in your bar or pub, you now need to decide how to hang the dartboard.
INSTALLATION OPTIONS WHEN HANGING YOUR DARTBOARD:
Whether you’re installing your dartboard in your home, a bar, a pub, a restaurant, or in a club, you have to decide how you want to hang your dartboard. Here are the two primary choices:
Option 1: Hanging your dartboard DIRECTLY ON A WALL (without a backboard or dartboard cabinet.)
Option 2: Hanging your dartboard ON A BACKBOARD or IN A DARTBOARD CABINET
The instructions for Option 1 and Option 2 are explained in detail in the next two sections.
OPTION 1: INSTALLATION STEPS & MEASUREMENTS for 1: Hanging your dartboard DIRECTLY ON A WALL (without a backboard or dartboard cabinet.)
Tools You’ll Need for Option 1: Pencil, hammer, an optional surround (such as a plain, black surround), tape, a level, a tape measure (or the optional Winmau Set Up Pro, or the optional Viper ProThrow Line Marker Tape).
Before You Begin:
Now is the time to refer to the instruction sheet and materials, screws, bracket, etc., that came in the same box as your dartboard. You’ll want to keep the bracket, screws, level, your electric drill, and your pencil within reach.
Option 1: Measurement 1: (INSTALLING THE DARTBOARD DIRECTLY ON A WALL (without a backboard or dartboard cabinet.)
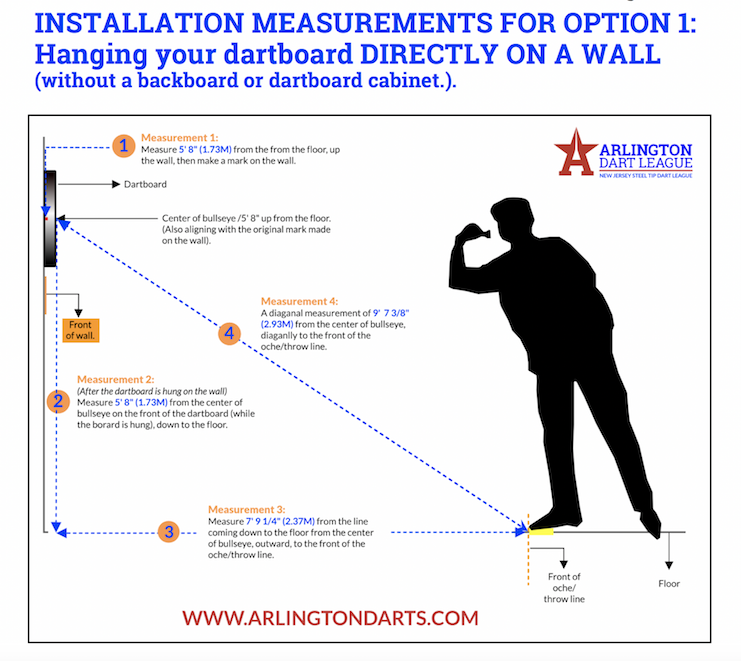
For your first measurement in Option 1, place the tip of the tape measure against the floor, pulling the tape measure straight up against the wall to 5ft. 8in. (5' 8"). Take your pencil and mark the spot on the wall. This mark indicates where to drill the bracket into the wall, and ultimately hang/install the dartboard on the bracket. The mark will also align with the center of the bullseye on the front of the hung dartboard.
Next, locate the bracket and the two bracket screws that came with your dartboard and keep them within reach. If you bought a new dartboard, the bracket and the bracket screws may have come in a small bag or pouch.
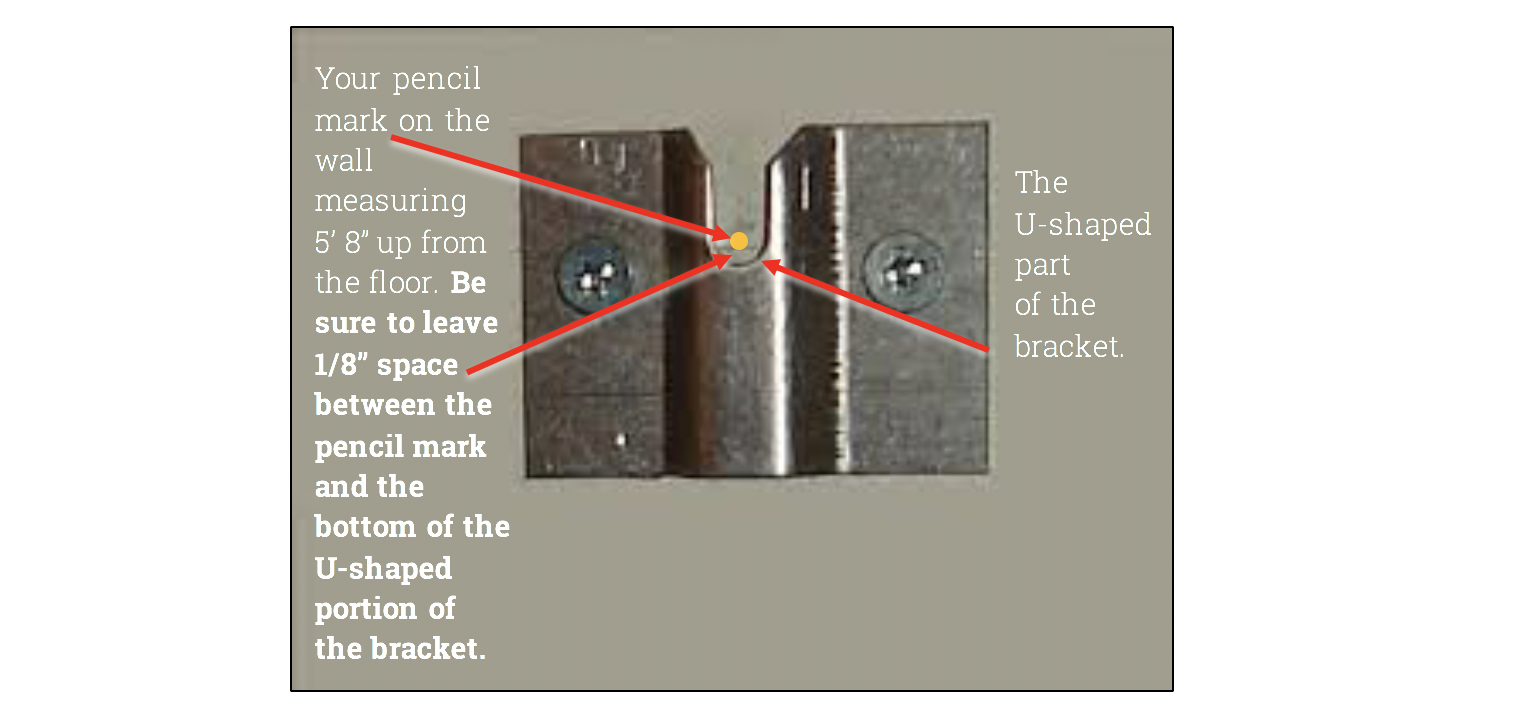
Another close-up of the bracket that comes in the packet used for dartboard set up.
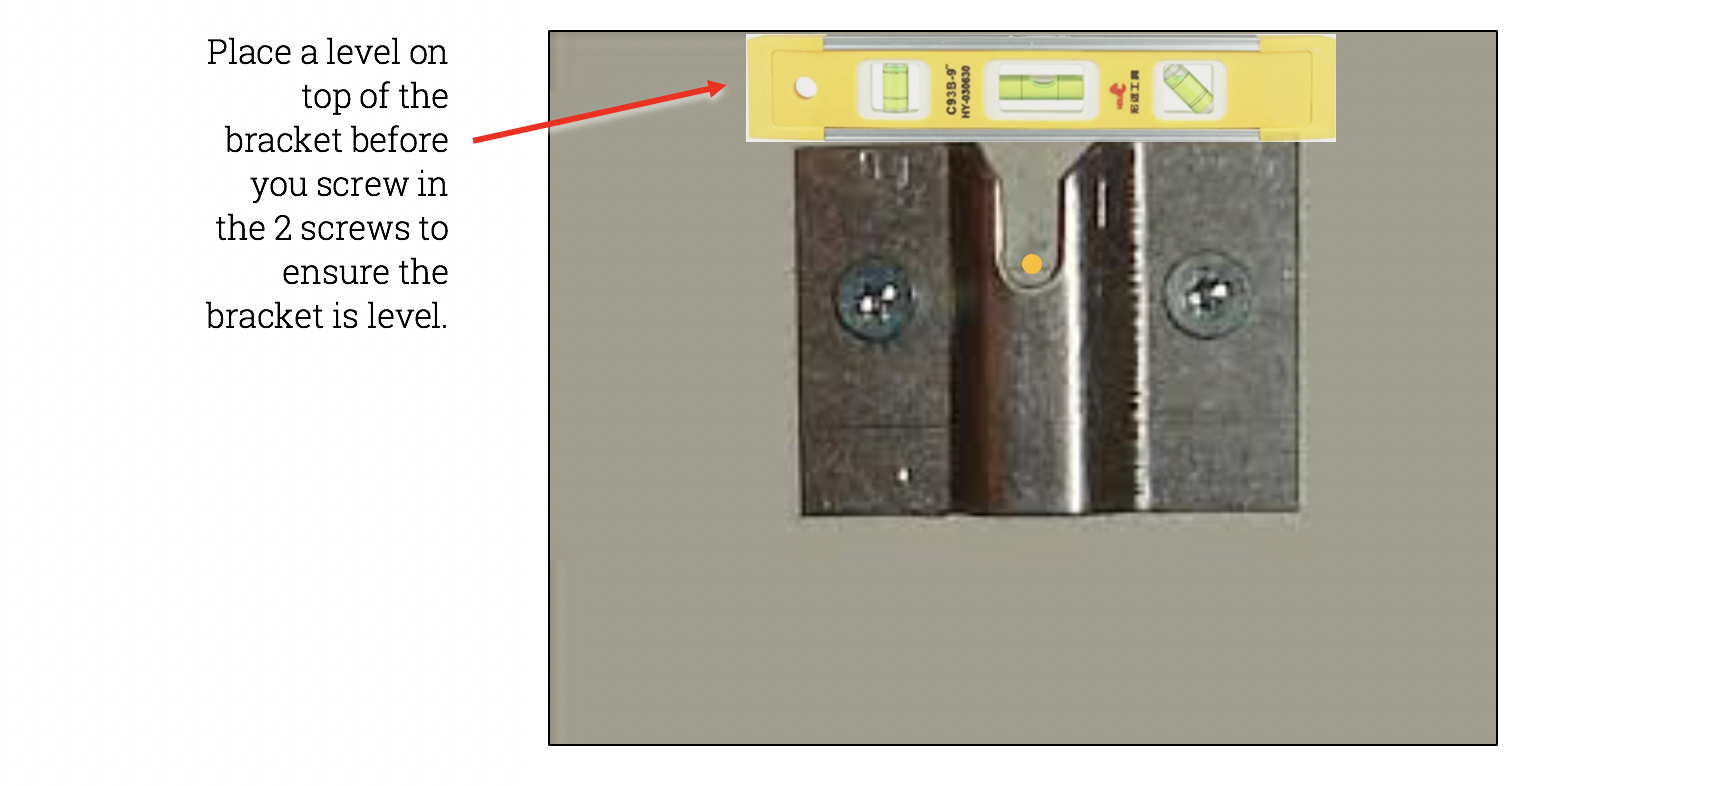
Next, take a small level and place it on top of the bracket to ensure the bracket is level. If you’re confident enough, simply ‘eye it up’ with your own eyes ensuring the bracket is level. Next, while holding the bracket tightly against the wall, take your pencil and make a mark in the holes on both sides of the bracket. With the marks in place, use your electric drill/screwdriver to screw the two screws into both sides of the bracket, tightly securing the bracket to the wall. If possible, the screw the bracket into a wall stud for extra stability.
Be sure the bracket is level when prior to hanging your dartboard.
Finally, with the bracket firmly installed on the wall, the 3 rubber knobs or spacers installed on the back of the dartboard, and the small screw drilled into the center of the dartboard, you’re ready to place the dartboard onto the bracket.
Before moving on to the next steps, it’s time to take one minute to double-check your mark on your wall described in Measurement 1 (measured from the floor, up to 5ft. 8in. /5' 8". When the dartboard is hung, that mark will also align with the center of the bullseye.
Hang the Dartboard on the Bracket
With the bracket firmly secured to the wall, hold the dartboard with one hand on each side, slowly slide the screw on the back of the dartboard into the cut-out, (U-shaped) slot portion of the bracket. Upon sliding the screw into the bracket, the board should feel snug up against the wall with no wiggle room.
Do a Quick Test.
As a quick test, place your finger on any far corner of the board and push up and down. If the board wobbles up and down, it’s too loose.
Simply slide the board off the bracket, tighten the small screw (on the back of the dartboard) into the board a little more, and/or adjust the spacers (if they are adjustable). Slide the board back into bracket and test the fit again. Keep adjusting if needed.
Congratulations! Now comes the easy part. Just a few more small steps to go!
Now that the dartboard is up on the wall, it’s time to make the remaining measurements and marks to fully complete your dartboard installation.
Please take a moment to review the measurements in this diagram before continuing to the final steps:
 NOTE: Once again, you’ll want to keep the tape measure or (optional) Viper ProThrow Line Marker Tape or (optional) Winmau Set Up Pro), and your pencil, within reach.
Option 1: Measurement 2: INSTALLING THE DARTBOARD DIRECTLY ON A WALL (without a backboard or dartboard cabinet.)
Measurement 2 is similar to Measurement 1. However, be sure to take this measurement from the front of the dartboard while the board is hung on the wall. begin, locate your tape measure and grab a dart. With the dartboard hung, stick the point of the dart through the hole at the end of the tape measure and push the tip of the dart into the center of the bullseye on the hung dartboard to hold the tape measure in place. Next, pull the tape measure straight down to the floor. The measurement from the center of the bullseye to the floor should be exactly to 5ft. 8in. (5′ 8″) as shown in Measurement 1. Now, using a piece of tape or a pencil, mark this spot on the floor. (See Measurement 2 in the diagram.)
Remember, if you are taking the measurements by yourself, it helps to have the Winmau Set Up Pro, or the Viper ProThrow Line Marker Tape.
Option 1: Measurement 3: INSTALLING THE DARTBOARD DIRECTLY ON A WALL (without a backboard or dartboard cabinet.)
Next, place the tip of the tape measure on the mark you just made on the floor (in Measurement 2), and pull the tape measure straight out away from the dartboard (level with the floor) to 7ft. 9 1/4in. (7' 9 1/4") and mark that spot on the floor with tape or a pencil. See Measurement 3 in the diagram on Page 25 of the Free Downloadable Visual Guide.)
Option 1: Measurement 4: INSTALLING THE DARTBOARD DIRECTLY ON A WALL (without a backboard or dartboard cabinet.)
Once again, stick the point of the dart through the hole at the end of the tape measure and push the tip of the dart into the center of the bullseye on the hung dartboard. Now, pull the tape measure out diagonally to 9ft. 7 1/4in. (9' 7 1/4"). (See Measurement 4 in the diagram.)
This diagonal mark should align perfectly with the previous mark you just made on the floor for Measurement 3. This is where to place the front edge of the oche/throwline, or long piece of blue painters tape.
Option 1: Final Step: INSTALLING THE DARTBOARD DIRECTLY ON A WALL (without a backboard or dartboard cabinet.)
With your dartboard hung on the wall, all that’s left is to place the optional surround around the dartboard and install proper, dedicated lighting above the dartboard.
INSTALLATION STEPS & MEASUREMENTS for OPTION 2: Hanging your dartboard DIRECTLY ON A BACKBOARD or in a CABINET.
TOOLS YOU’LL NEED FOR OPTION 2:
Tools You’ll Need for Dartboard Set Up: You'll need a pencil, hammer, an optional surround, tape, a level, a tape measure (or the optional Winmau Set Up Pro, or the optional Viper ProThrow Line Marker Tape). You will also need four screws or molly screws to hang the backboard or cabinet on the wall.
Option 2 outlines how to hang your dartboard on a backboard or in a dartboard cabinet. For this option, you must first mount your backboard or cabinet on the wall before you can hang the dartboard.
BEFORE YOU BEGIN:
Now is the time to refer to the instruction sheet and materials, screws, bracket, etc., that came with your dartboard. You’ll want to keep the bracket, screws, level, your electric screwdriver/ drill, and your pencil within reach.
Option 2: Measurement 1: HANGING THE DARTBOARD ON a BACKBOARD or IN a CABINET:
For your first measurement in Option 2, you’ll need to mark the center of your backboard or cabinet. Using a tape measure, mark the center on the front of the backboard. This ensures the dartboard is centered and evenly spaced when installed on the backboard. The mark also indicates where the bracket will be installed.
Option 2: Measurement 2: HANGING THE DARTBOARD ON a BACKBOARD or IN a CABINET:
Measure the height of the backboard and divide by two. Subtract that measurement from 5ft. 8in. (5' 8"). That total will indicate how far to measure up the wall from the floor and mark where the bottom edge of the backboard will be placed.
Example: If your backboard measures 36” high, divide by 2 and that gives you 18”. Subtract 18” from 5’8”. (68”-18” = 50”) You should mark the wall 50” from the floor. This will mark the spot for the bottom edge of the backboard.
Mount the Backboard to the Wall:
(Here is where it pays to have a friend help you.)
Using your electric drill, pre-drill your screws halfway into the backboard. This will make it easier to screw into the wall while holding it up. If possible, try to align the screws with the wall studs to ensure support for the weight of the backboard and dartboard. If this is not possible, you may want to use Molly Bolts that will allow support of heavy objects on drywall where no studs are available.
Holding the backboard with one hand on each side, slowly slide the backboard, alingning the bottom edge with your wall mark. With one hand holding the back board, place the level on top to ensure it is even. Now, drill the top two screws into the wall. Again, check if the board is level. If so, drill the bottom two screws into the wall. The hard part is done!
Option 2: Measurement 3: HANGING THE DARTBOARD ON a BACKBOARD or IN a CABINET:
The mark you make at Measurement 1, to indicate the center of the backboard or cabinet, should now be 5’ 8” from the floor and is where the bracket will installed.
Before drilling, take another measurement to be sure it is the correct height. The mark will also align with the center of the bullseye on the front of the hung dartboard.
Mount the Bracket on the Backboard or Cabinet:
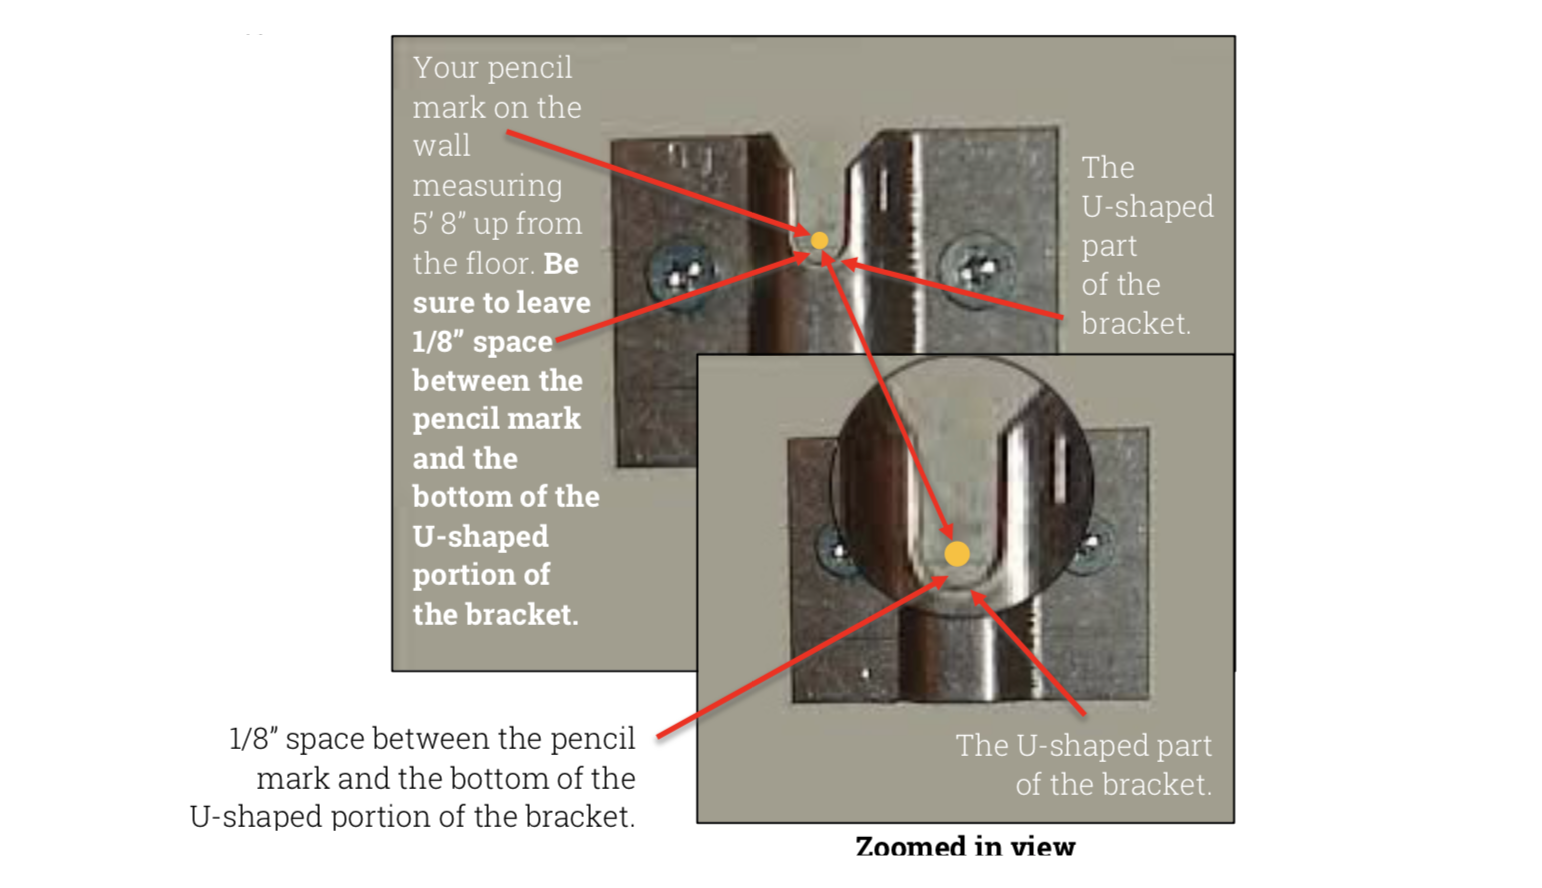
Next, place the bracket on the front of the backboard or cabinet, aligning it with the pencil mark you previously made on the front of the backboard or cabinet. Position the bracket so the U-shaped portion at the bottom of the bracket is about 1/8” below the pencil mark, so the pencil mark remains visible.
This is where the screw on the back of your dartboard will rest on the bracket, ensuring the center of the bullseye remains aligned with the pencil mark.
Next, take a small level and place it on top of the bracket to ensure the bracket is level. If you’re confident enough, simply ‘eye it up’ with your own eyes ensuring the bracket is level.
Next, while holding the bracket tightly against the backboard or cabinet, take your pencil and make a mark in the holes on both sides of the bracket. With the marks in place, use your electric drill/screwdriver to screw the screws into the bracket holes. Be sure to tightly secure the bracket to the backboard or cabinet.
Be sure the bracket is level when prior to hanging your dartboard.
Dartboard Screw:
Next, locate the small, standalone screw that came with the dartboard. This screw is a different size than the two bracket screws. Next, locate the pre-made hole or mark directly in the center of the backside of the dartboard. Next, screw the screw into the center mark on the back of the dartboard, but DO NOT screw it all the way in. Leave about 1/8” of space at the top of the screw.
Mount the Dartboard to the Bracket on the Backboard or Cabinet:
Finally, with the bracket firmly installed on the backboard or cabinet, the 3 rubber knobs or spacers installed on the back of the dartboard, and the small screw drilled into the center of the dartboard, you’re ready to place the dartboard onto the bracket.
Holding the dartboard with one hand on each side, slowly slide the screw on the back of the dartboard into the cut-out, (U-shaped) slot portion of the bracket now installed in the backboard or cabinet. Upon sliding the screw into the bracket, the dartboard should feel snug up against the backboard or cabinet with no wiggle room. As a quick test, place your finger on any far corner of the dartboard and push up and down.
Is the Board Wobbly or Loose?
If the board wobbles up and down, it’s too loose. Simply slide the board off the bracket, tighten the small screw (on the back of the dartboard) a little more. Slide the board back into bracket and test the fit again. Keep adjusting if needed. If the board still wobbles after adjusting, you can slip folded pieces of cardboard, paper, or a small foam wedge under each side of the dartboard until the dartboard no longer wobbles.
Now that the dartboard is up on backboard or in the cabinet, it’s time to make the remaining measurements and marks to fully complete your dartboard installation.
Congratulations!
Now comes the easy part. Just a few more small steps to go!
Please take a moment to review the measurements in this diagram before proceeding to the remaining steps in Option 2.
NOTE: Once again, you’ll want to keep the tape measure, a level, optional Winmau Set Up Pro, or the optional Viper ProThrow Line Marker Tape and your pencil, within reach.
Option 2: Measurement 4: HANGING THE DARTBOARD ON a BACKBOARD or IN a CABINET:
Measurement 4 is similar to Measurement 3. However, be sure to take this measurement from the front of the dartboard while the board is hung on the backboard or cabinet. (See diagram.)
To begin, locate your tape measure and grab a dart. With the dartboard hung on the backboard or cabinet, stick the point of the dart through the hole at the end of the tape measure and push the tip of the dart into the center of the bullseye on the hung dartboard to hold the tape measure in place. Next, pull the tape measure straight down to the floor.
The measurement from the center of the bullseye to the floor should once again be exactly to 5ft. 8in. (5′ 8″) as shown in Measurement 1. Now, using a piece of tape or a pencil, mark this spot on the floor.
Remember, in lieu of a tape measure, you can use the optional Winmau Set Up Pro, or the optional Viper ProThrow Line Marker Tape.
Option 2: Measurement 5:HANGING THE DARTBOARD ON a BACKBOARD or IN a CABINET:
Next, place the tip of the tape measure on the mark you just made on the floor (in Measurement 2), and pull the tape measure straight out away from the dartboard (level with the floor) to 7ft. 9 1/4in. (7' 9 1/4") and mark that spot on the floor with tape or a pencil
Option 2: Measurement 6: HANGING THE DARTBOARD ON a BACKBOARD or IN a CABINET:
Once again, stick the point of the dart through the hole at the end of the tape measure or optional Winmau Set Up Pro or the optional Viper ProThrow Line Marker Tape and push the tip of the dart into the center of the bullseye on the hung dartboard.
Another close-up of the bracket that comes in the packet used for dartboard set up.
Now, pull the tape measure (or optional Winmau Set Up Pro or the optional Viper ProThrow Line Marker Tape) out diagonally to 9ft. 7 1/4in. (9' 7 1/4"). (If you are taking the measurements by yourself, using the optional Winmau Set Up Pro, or the optional Viper ProThrow Line Marker Tape will help.)
This diagonal mark should align perfectly with the previous mark you made on the floor for Measurement 3. This is where to place the oche/throwline.
Option 2: Final Step: THE DARTBOARD ON a BACKBOARD or IN a CABINET:
If you hung your dartboard on a backboard (not in a cabinet), an optional, final step is to place the optional surround around the dartboard and ensure the proper, dedicated lighting is positioned above the backboard or cabinet, illuminating the dartboard as much as possible. To help with this, it is recommended to use LED lightbulbs instead of traditional yellow bulbs.
Wine Discount

Have you ever installed dartboard?
Tell us how your dartboard set up experience went. Would you add additional information or step? Let us know, below.
CONNECTED AND RECEIVE UPDATES
Follow and stay connected to the Arlington Dart League on Facebook and Twitter, or visit the ADL website to subscribe to the newsletter. for more information and great darting resources. Finally, if you want a chance to win some really sweet ADL SWAG, I invite you to take part in the ADL survey.
About the Author:
Sean Brennan is the VP of Branding and Marketing for the Arlington Dart League. He designed the new ADL identity, the league website, and never hesitates to lookup local dart bars whenever he travels. Sean has been playing darts since he was 15 years old, and forged some of his fondest dart memories at that age including playing in a weekly Luck of the Draw at a local New Jersey tavern with his father, and having the honor of playing against John Lowe. If you have questions or comments about this article, you can email Sean directly or follow Sean on Twitter.
THINK BEFORE YOU REPLY